Integration
At the moment it supports the following engine versions:
- UE 5.8
- UE 5.7
- UE 5.6
- UE 5.5
- UE 5.4
- UE 5.3
- UE 5.2
- UE 5.1
- UE 5.0
- UE 4.27
- UE 4.26
- UE 4.25
Integrate DataConfig Plugin
The easiest way to try out DataConfig is to add it as a plugin into your C++ project. In this section we'll walk through these steps.
Download DataConfig Plugin
The quickest way to try out DataConfig is to download the latest release at DataConfig releases page.
-
Download the zip files on the releases page. Note there're UE4 and UE5 plugin respectively.
-
Unzip it into your Unreal Engine project's
Pluginfolder. The layout should be like this:
<Your project root>
|- <Your project>.uproject
|- Content
|- Source
|- ...
|- Plugins
   |- DataConfig
      |- DataConfig.uplugin
Generate DataConfig Plugin for UE4/UE5
DataConfig now uses separate uplugin files for UE4 and UE5 so that we can try out new features in UE5 without dropping support for UE4. We bundled scripts to generate clean plugins for UE4 and UE5. This is how the DataConfig releases are built.
git clone https://github.com/slowburn-dev/DataConfig
# requires python 3.6+
python ./DataConfig/Misc/Scripts/make_dataconfig_ue4.py
python ./DataConfig/Misc/Scripts/make_dataconfig_ue54.py
python ./DataConfig/Misc/Scripts/make_dataconfig_ue5.py
DataConfigXX.uplugin
Ultimately we figured that we'll need multiple .uplugin files to support across UE versions:
| Name | Version |
|---|---|
| DataConfig4.uplugin | 4.25 - 4.27 |
| DataConfig54.uplugin | 5.0 - 5.4 |
| DataConfig5.uplugin | 5.5 - Latest |
When packaging for each engine version we rename the one we want and delete the rest.
Manual Steps for UE5 Latest
-
Get a copy of DataConfig repository. Then copy
./DataConfig(whereDataConfig.upluginis located) into your project'sPluginsdirectory. -
Delete
DataConfig4.uplugin, and otherDataConfig5X.uplugin. -
Delete
DataConfig/Source/DataConfigHeadlessfolder. This step is crucial or your project won't build.
Manual Steps for UE4
-
Get a copy of the repository. Then copy
./DataConfig(whereDataConfig.upluginis located) into your project'sPluginsdirectory. -
Delete
DataConfig.uplugin, then renameDataConfig4.uplugintoDataConfig.uplugin. -
Delete
DataConfig/Source/DataConfigHeadlessfolder. This step is crucial or your project won't build. -
Additionally delete UE5 specific modules.
DataConfig/Source/DataConfigEngineExtra5
Validate integration
Follow these steps to ensure DataConfig is properly integrated into your project.
-
Restart your project. There should be a prompt to compile plugin sources. Confirm and wait until your project launches. Then open
Settings -> Pluginsyou should see Data Config listed under Project Editor category.
-
The plugin comes with a set of tests. Open menu
Window -> Developer Tools -> Session Frontend. Find and run theDataConfigtests and it should all pass.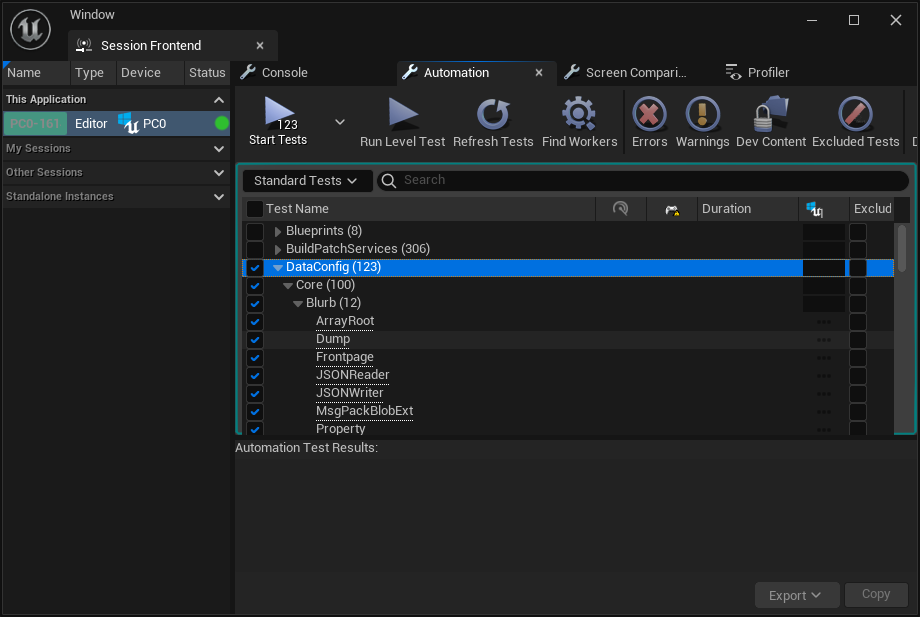
Integrate DataConfigCore Module
DataConfig is packed into a plugin to bundle automation tests with a few assets. You're encouraged to integrate only the DataConfigCore module. It contains all core features with minimal dependencies.
Most projects should have an editor module already set up. In this section we'll go through the steps of integrating DataConfigCore and build it with the project's FooProjectEditor module.
-
Get a copy of this repository. Then copy
DataConfig/Source/DataConfigCoreinto your project'sSourcedirectory. -
Edit
FooProjectEditor.Build.csand addDataConfigCoreas an extra module:using UnrealBuildTool; public class FooProjectEditor : ModuleRules { public FooProjectEditor(ReadOnlyTargetRules Target) : base(Target) { PublicDependencyModuleNames.AddRange(new string[] { //... "DataConfigCore", // <- add this }); } } -
DataConfig needs to be explicitly initialized before use. Find
FooProjectEditormodule's start up and shut down methods and setup DataConfig accordingly.#include "DataConfig/DcEnv.h" #include "DataConfig/Automation/DcAutomationUtils.h" void FFooProjectEditorModule::StartupModule() { // ... DcStartUp(EDcInitializeAction::SetAsConsole); // dump a FVector to try it out FVector Vec(1.0f, 2.0f, 3.0f); FDcPropertyDatum VecDatum(TBaseStructure<FVector>::Get(), &Vec); DcAutomationUtils::DumpToLog(VecDatum); } void FFooProjectEditorModule::ShutdownModule() { // ... DcShutDown(); } -
Rebuild the project and restart the editor. Open
Output Logand you should be able to find the dump results (to filter useCategories -> None).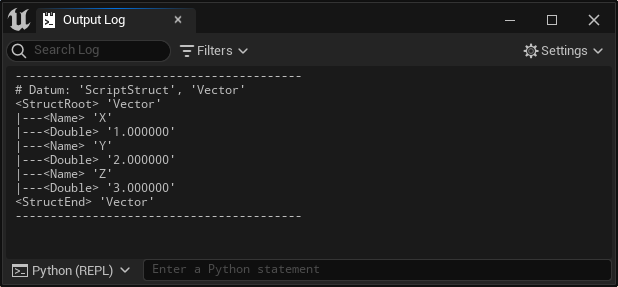
You can refer to Module Setup for more detailed integration instructions.